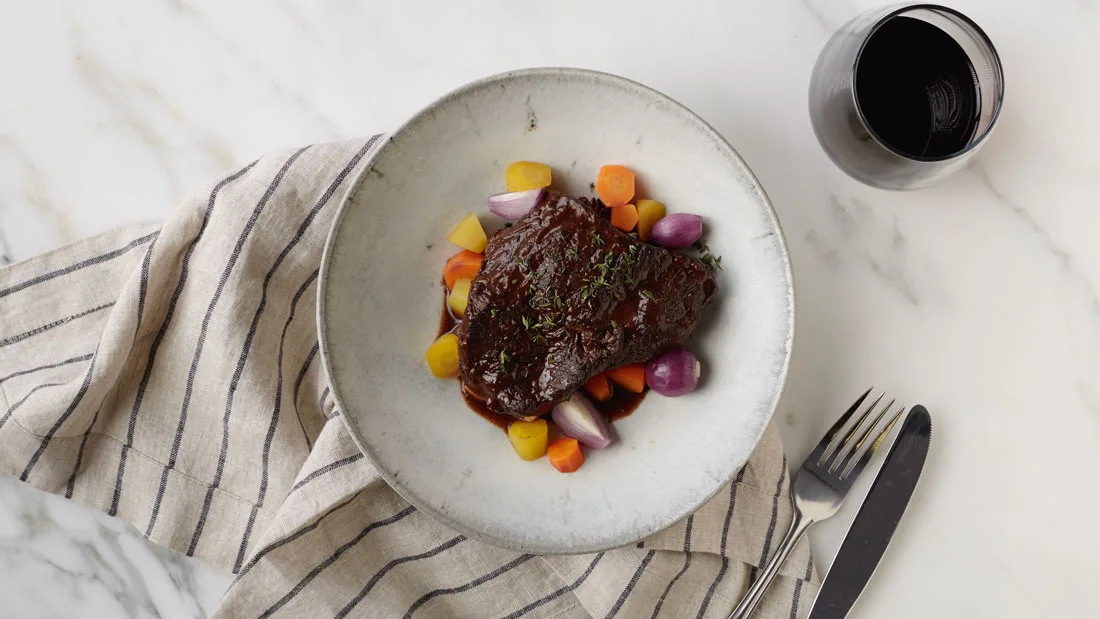
2 Ways to Cook Beef Cheeks
Plus, why we love eating them so much!

While typically a stronger and tougher muscle, beef cheeks transform into meltingly tender, meaty goodness that nearly falls apart when braised or cooked low and slow. Serious beef lovers cherish the extraordinarily juicy flavor that picks up extra succulence the longer it’s cooked.
What are you waiting for? Get cooking!
Braised Beef Cheeks
What You’ll Need:
1 large slice of bacon
1–2 sprigs of rosemary
3 sprigs of thyme
1 bay leaf
4 pounds beef cheeks
2 tablespoons vegetable oil
2–3 carrots, peeled and cut into 1-inch pieces
1 large onion, cut into 1-inch pieces
4 garlic cloves, peeled and halved
5–6 whole black peppercorns (optional)
2 tablespoons tomato paste
2 tablespoons all-purpose flour
1 bottle dry red wine
2–3 cups beef stock or low sodium beef broth
Kosher sea salt and ground pepper
Tools: kitchen twine, Dutch oven, parchment paper
What to Do:
Lay the bacon on a flat surface. Roll rosemary, thyme, and bay leaf into the bacon, and tie with kitchen twine to keep intact.
Season the beef cheeks with salt and pepper on both sides.
Turn the stovetop burner to medium-high heat. When hot, sear the beef cheeks on both sides until you get a golden brown crust. Be careful not to crowd the pan—work in batches if necessary. Set aside when done, and remove all but 1/4-cup fat from the pan. (If there isn’t much fat in the pan, add a little vegetable oil.)
Add the carrots, onion, garlic, and black peppercorns (if using) and sauté until light brown.
Stir in tomato paste, cook for 2 minutes.
Add in the flour, stirring well for about a minute.
Add the bacon wrapped herbs and the wine, and reduce by about a 1/3 on medium heat (about 45 minutes). In the meantime, preheat the oven to 325°F.
Return the beef cheeks to the pot, add salt and enough stock to cover the meat.
Bring to a simmer, then transfer to the pre-heated oven. If using, place the pre-cut parchment paper directly on the liquid surface, and press down so it is evenly touching around the entire pot. Cook for about 4 hours, until the beef cheeks easily fall apart with a fork.
Remove the beef cheeks from the pot and strain cooking liquid through a fine strainer to reserve the liquid. Discard the vegetables skim any fat off the top. Cook the liquid over medium heat until the liquid is reduced to one quart, or desired consistency.
Return beef cheeks to liquid to reheat. Serve with Sides in a Snap Polenta.
Have leftovers? Make these easy beef cheek tacos!
Braised Beef Cheek Tacos
What You’ll Need:
Braised beef cheeks, shredded
Cilantro
Tortillas
Pickled red onions (recipe below)
Vinaigrette (recipe below)
What to Do:
Heat up the beef cheeks in their liquid, then pull them out. Shred on a cutting board, then fill your favorite taco shell with shredded beef cheeks, pickled red onions, cilantro, and squeeze of lime. (Pickled red onions are key, so make those the night before.)
The beef cheeks are great shredded as is, but if you have a few extra minutes, try adding thgis vinaigrette to it!
Vinaigrette—What You’ll Need:
1/2 cup of the red wine/broth liquid
1/3 cup loose cilantro leaves
1 small chipotle (about 2–3 tablespoons)
Juice from 1-2 limes
1 clove of garlic
1/2 teaspoon ground cumin
1/4 teaspoon ground cayenne
What to Do:
Combine in a food processor. Once thoroughly processed, mix as much a want with the shredded beef cheeks, then throw it in a taco!
Pickled Red Onions—what you’ll need:
1 medium red onion
1/2 teaspoon sugar
1/2 teaspoon salt
3/4 cup white wine vinegar or apple cider vinegar
Peppercorns
What to Do:
Slice the onions thinly into approximately 1/4-inch moons. Place onions a heat safe storage container, like a mason jar.
Add the sugar, salt, and peppercorns to a small sauce pot. Add the vinegar and stir until the sugar and salt are dissolved. Place a lid on the pot and bring the mixture up to a boil over medium-high heat.
Pour vinegar mixture over onions in the container, making sure the onions are all covered in liquid.
Let come to room temp before placing in the fridge. They should be ready in a few hours, but will be better the next day. Generally keeps in fridge for 2 weeks.
There’s more! Feel free to add whatever you think sounds good to the mixture—we also like garlic, peppercorns, allspice berries, or chili peppers. For crunchy onions, pour the boiling vinegar over the onions. If you prefer softer onions, then add the onions into the boiling vinegar and cook for a few minutes before putting it all back into the container.
